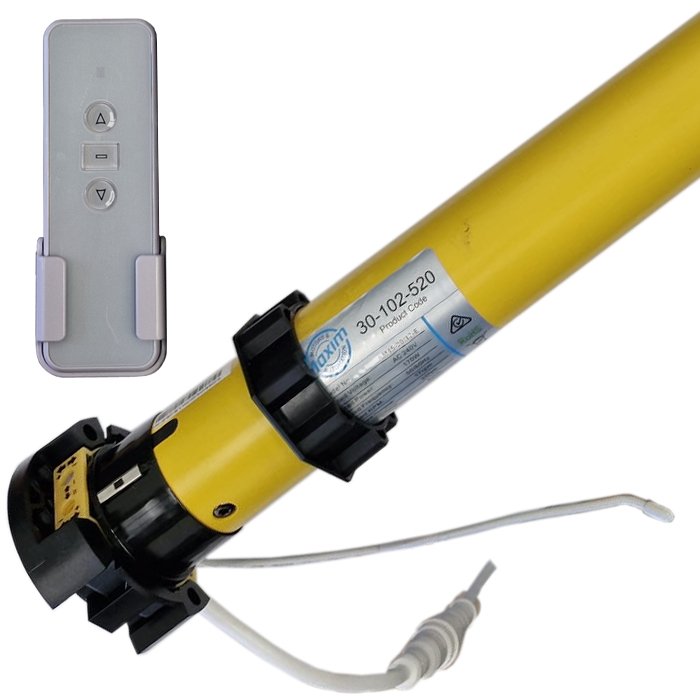
MAXIM AM45 Electric motors come with 5 years Guarantee.
Features
- Supply Voltage – 230v 50Hz motor
- Torque – 50nm
- Speed – 17 rpm
- Operating the tubular motor with a switch
- Adjustment by turntables
- With 1.5 meters of wire.
- Lifting Capacity – 80 kg
- Protection Level – IP44
- Current Consumption – 0.75A
Highlights
- Universal motor – Suitable for roller shutter and sun protection applications
- Suitable for left and right-hand installation – No extra storage space is required due to the different types of drives
- No fixed buffers required for operation – Suitable for roller shutters without buffers
- Overheat protection for the motor – In the event of overheating, the temperature sensor will automatically switch off the motor to prevent damage
- Flexible limit adjustment tool included – Precise limit adjustment even in hard-to-reach areas
- Easy setting of final positions – Can be done without any specialist tools
- Can be combined with many CW wall brackets – Adaptable to multiple applications
- The shutter can be wound up around the motor head – Suitable for applications with limited space
ATTENTION
- Maxim Motors are not toys. Do not allow children to play with the control device(s).
- Maxim Motors is not waterproof. Electricity and water do not mix.
- All motors mounted externally require covering.
- All motors must be mounted horizontally.
- Maxim motors are designed for intermittent use only. A thermal overload switch protects the motor from damage caused by overheating.
- Maxim Motor is sensitive to impacts. Shocks will damage sensitive parts.
- Parallel wiring and dual switching of the standard switch-controlled Maxim motors are strictly forbidden.
- Drilling into the Maxim motor may cause irreparable damage
- Failure to observe the above will void the warranty of the motor and may pose a significant electrical and/ or mechanical hazard.
-
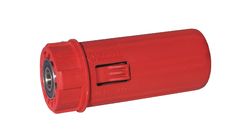
When ordering, specify the Drive Wheel required (Round or Octagonal).
-
Installation And wiring must be done by a qualified professional.
Specifications & Programming Instructions
- Qualified persons must only carry out electrical connections.
- The continuity of the earth connection provided for must be ensured.
- It is recommended that the power supply of each motor offers the possibility of being isolated, even though each motor comes with a in-line connector plug.
- If the installation includes several motors, only one MAXIM RF 50nm Tubular Motor is to be powered during the programming procedure to eliminate interferences with the other motors.
Up/Down Limit Setting
The Up/Down limit setting is manually done with 2 recessed progressive limits, yellow/white on the motor head. The instructions for limit setting come with the motor.
It is possible to connect a motor to a home automation system.
Transmitter Programming (Single or Multi-Channel)
1) Programming The First Transmitter
If a multi-channel Transmitter is being programmed, first select the channel required by using the minus (-) or plus (+) button on the transmitter until you have located the required channel number to be programmed.
- Connect the motor to the power supply. The motor performs a brief up/down movement.
- Within 10 seconds of this up/down movement –
- Press and HOLD the UP & DOWN buttons on the Transmitter together at the same time for more than 3 seconds until the motor performs a brief up/down movement followed by a second brief up/down/up/down movement (approximately 3 seconds later)
- The first Transmitter is now programmed.
2) Check the Direction of Rotation.
If the direction of rotation is correct (pressing the up button makes the motor raise the blind or shutter, and pressing the down button lowers the blind or shutter), proceed to step 4 to change the way the motor reacts to the remote control handset.
If the direction of rotation IS not correct, proceed to step 3 to rectify this.
3) Changing The Direction of Rotation
- To change the direction of rotation, use the pre-programmed transmitter and follow the steps below.
- Press the UP & DOWN buttons on the Transmitter together at the same time, until the motor performs a brief up/down movement.
- Then, press and HOLD the STOP button on the Transmitter for approximately 3 seconds, until the motor performs a brief up/down movement.
- Then, press the UP button on the Transmitter. The motor will perform a brief up/down/up/down movement.
- The direction of rotation has now been changed.
Check the direction of rotation is now correct. If it is not correct, go back to Step 3 and repeat this step again
If this is now correct, proceed to step 4
The following step will change the way the motor reacts when the remote control up or down button is pressed.
By default, the motor will only move in a step-by-step way when a single press of the button is given. The motor will not continue moving without holding the button down, until approximately 5 seconds of keeping the button pressed, only then will the motor keep moving when the button is released.
To change this reaction to the hand set to an immediate and continual movement with one single press, move to Step 4
4) Changing Between Dot (Inching) And Continuous Movement Mode
- Press the UP & DOWN buttons on the Transmitter together at the same time until the motor performs a brief up/down movement.
- Then, Press and HOLD the STOP button on the Transmitter for approximately 3 seconds until the motor performs a brief up/down movement.
- Then press the STOP button on the Transmitter. The motor will perform a brief up/down/up/down movement.
- The motor’s mode of movement has now been changed.
Check that the mode of movement is now correct. If it is not correct, go back to Step 4 and repeat this step.
If this is now correct, the programming is now complete.
Additional programming options
5) Adding a Second or Additional Transmitter
If a second transmitter is required to be programmed, follow the steps below.
If a multi-channel Transmitter is being programmed, or has been programmed, first select the channel by using the minus (-) or plus (+) button on the transmitter to select the correct channel number.
NEXT –
- Press the UP & DOWN buttons on an EXISTING Transmitter together at the same time until the motor performs a brief up/down movement.
- Release, then Press and HOLD the STOP button on the EXISTING Transmitter for approximately 3 seconds until the motor performs a brief up/down movement.
- Then, on the NEW Transmitter you wish to use, press the UP & DOWN buttons at the same time.
- The motor will perform a brief up/down/up/down movement, and the new Transmitter has now been memorised.
6) Removing A Transmitter
If a transmitter needs to be removed from the memory of the receiver, follow the steps below.
- If a multi-channel Transmitter is being removed, first select the channel to be removed by using the minus (-) or plus (+) button on the transmitter.
- Then, press the UP & DOWN buttons on an EXISTING Transmitter together at the same time until the motor performs a brief up/down movement.
- Release, then Press and HOLD the STOP button on the Transmitter for approximately 3 seconds until the motor performs a brief up/down movement.
- Then, press the DOWN button on the Transmitter you wish to delete. The motor will perform a brief up/down/up/down movement.
- The Transmitter or selected channel on a Transmitter has now been deleted.